
In this article, we’ll explore role templates—what’s available, how to create them, how to use them, and how Cara recommends them once they’ve been created.
Step 1: Create a new role
Go to New role and start creating a role. For this example we will use Barista.
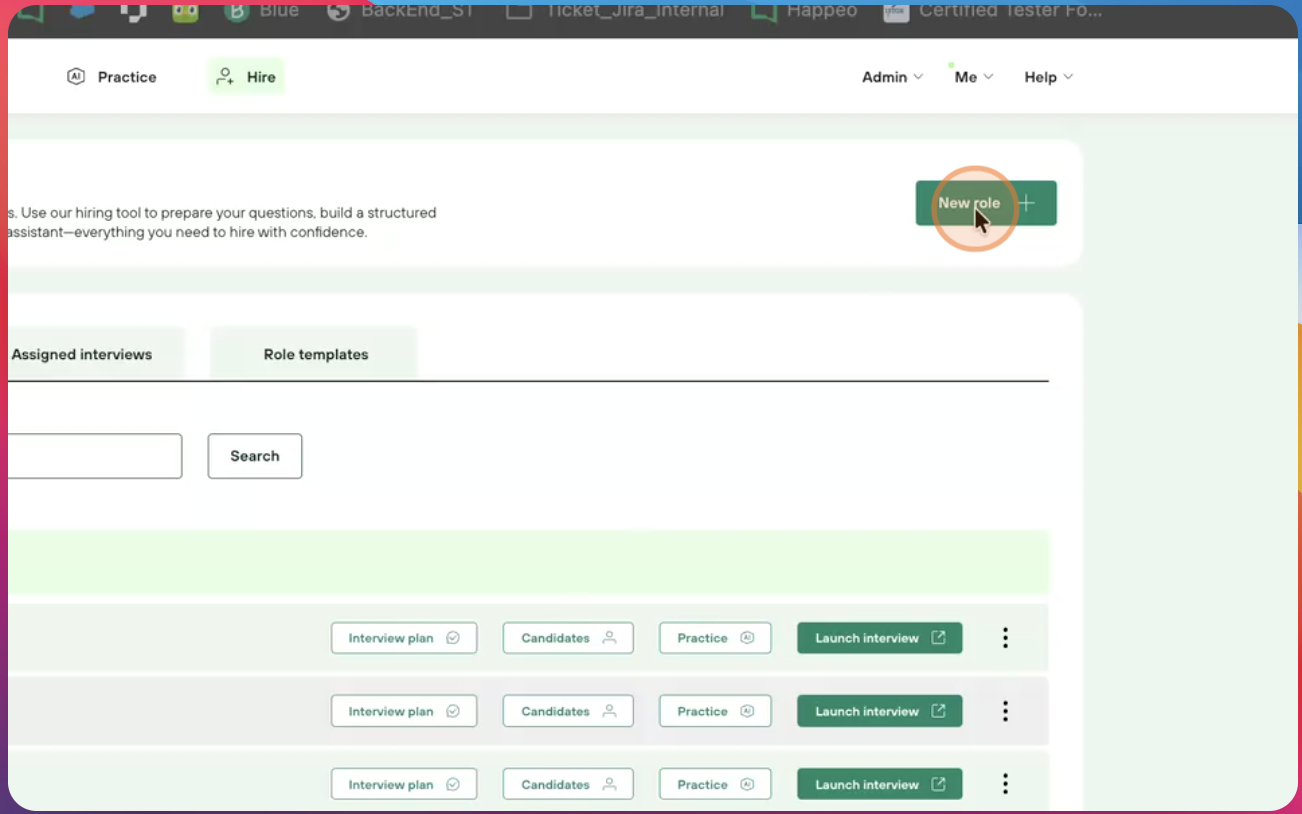
Go through the role creating process. Cara gathers all information from the job description and prepares the full plan.
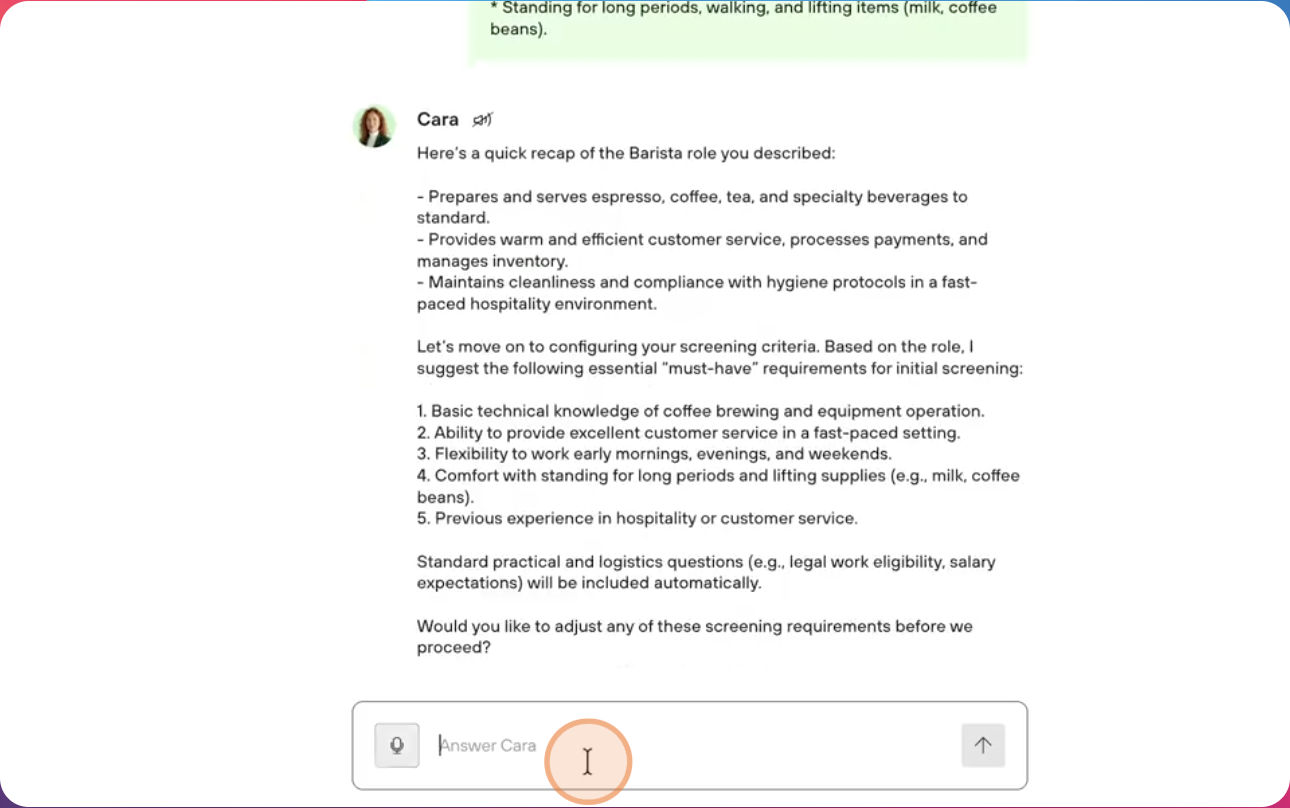
Step 2: Confirm the information
If you’re happy with the displayed information, move to the next step, where all skills, achievements, and behaviors are outlined.
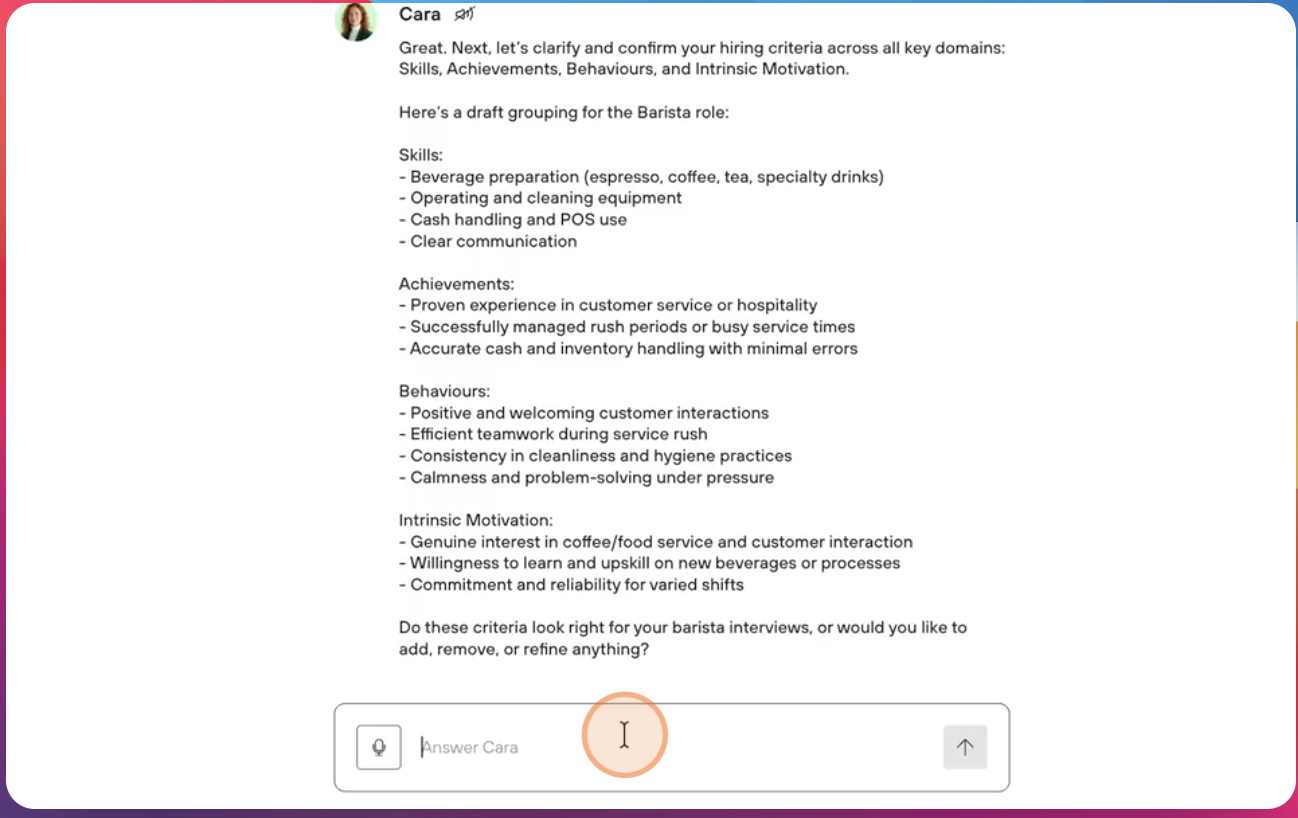
Step 3: Add elements
If you want to add anything, you can do so. Then proceed to the rounds, confirm them, and generate your interview plan.
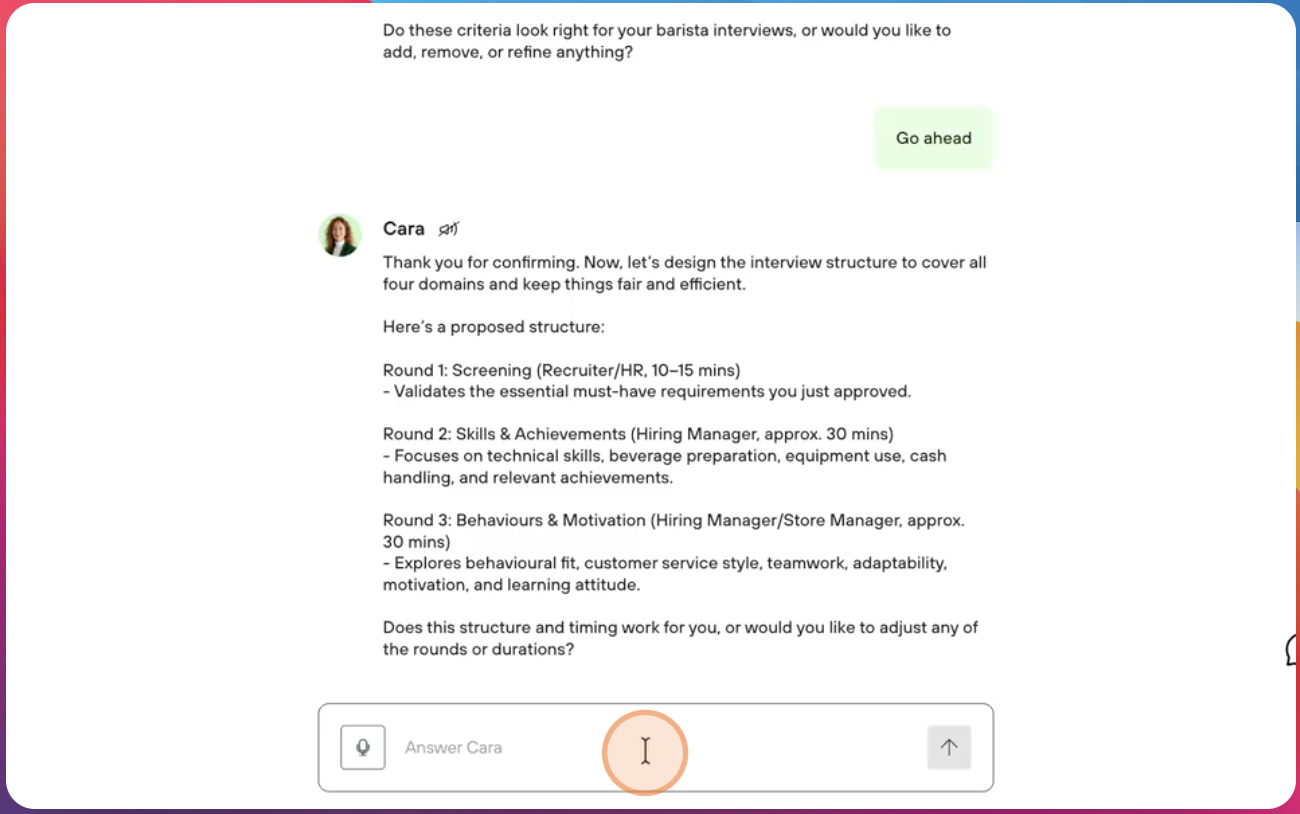
Step 4: Approve the plan
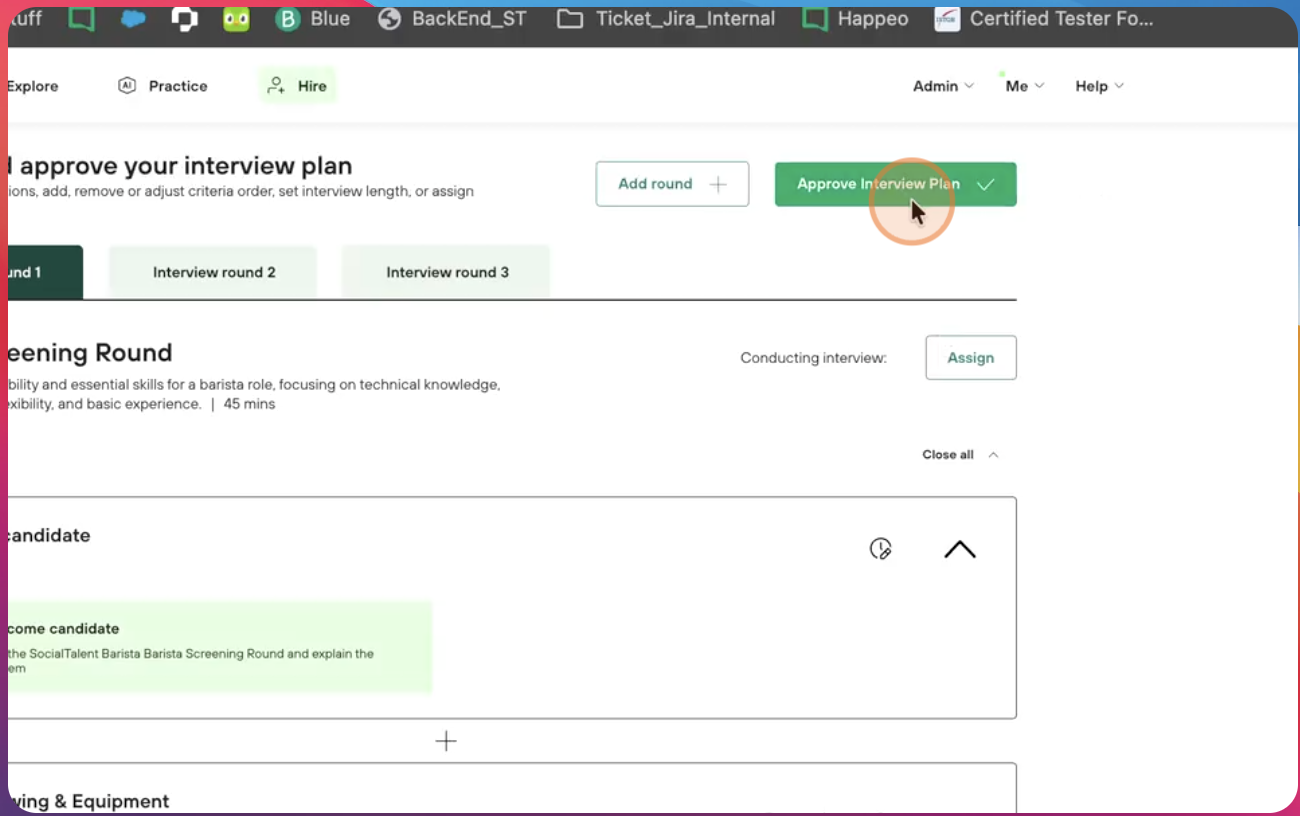
Once the plan is generated, you can approve it by selecting Approve interview plan.
Step 5: Save the plan as a template
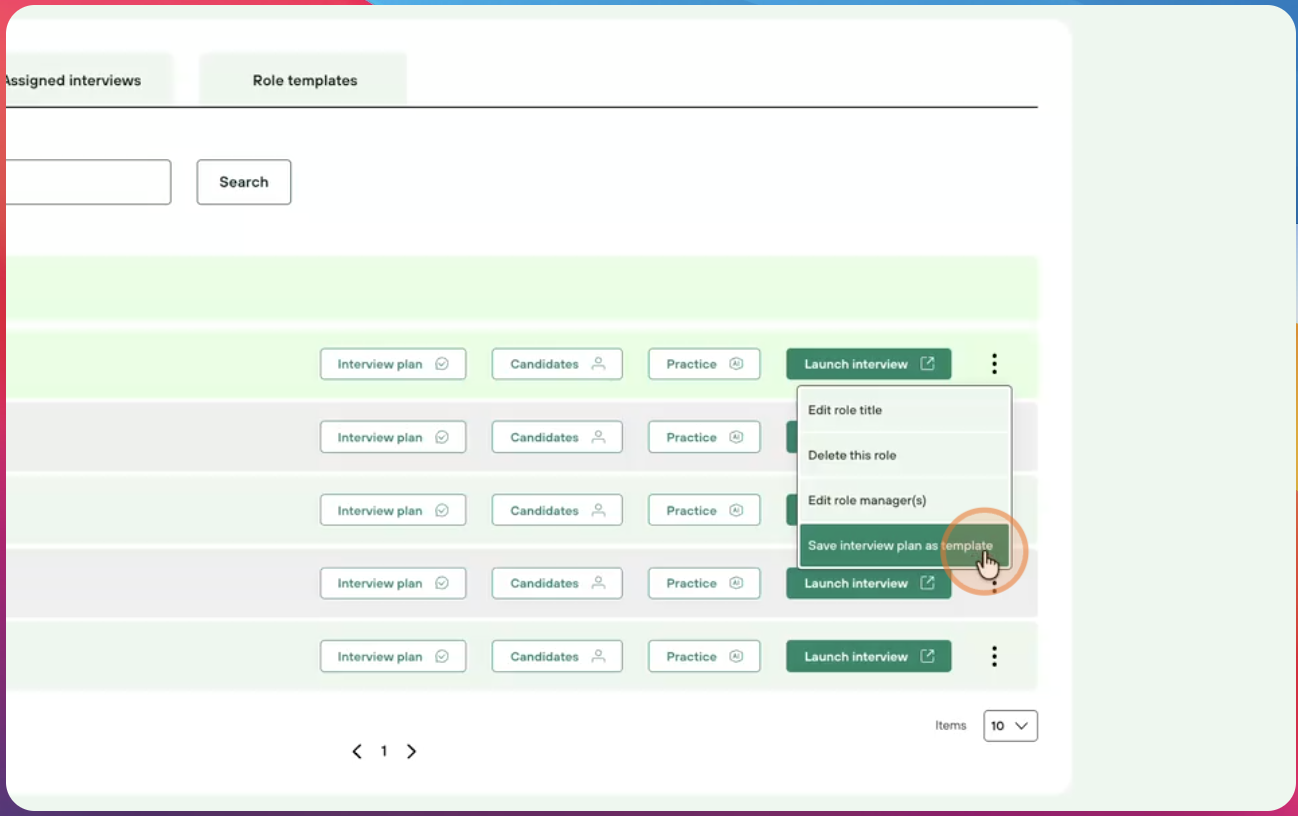
Click the three dots, then select Save interview plan as template. Add a title and optionally a description, then click Save interview plan as template.
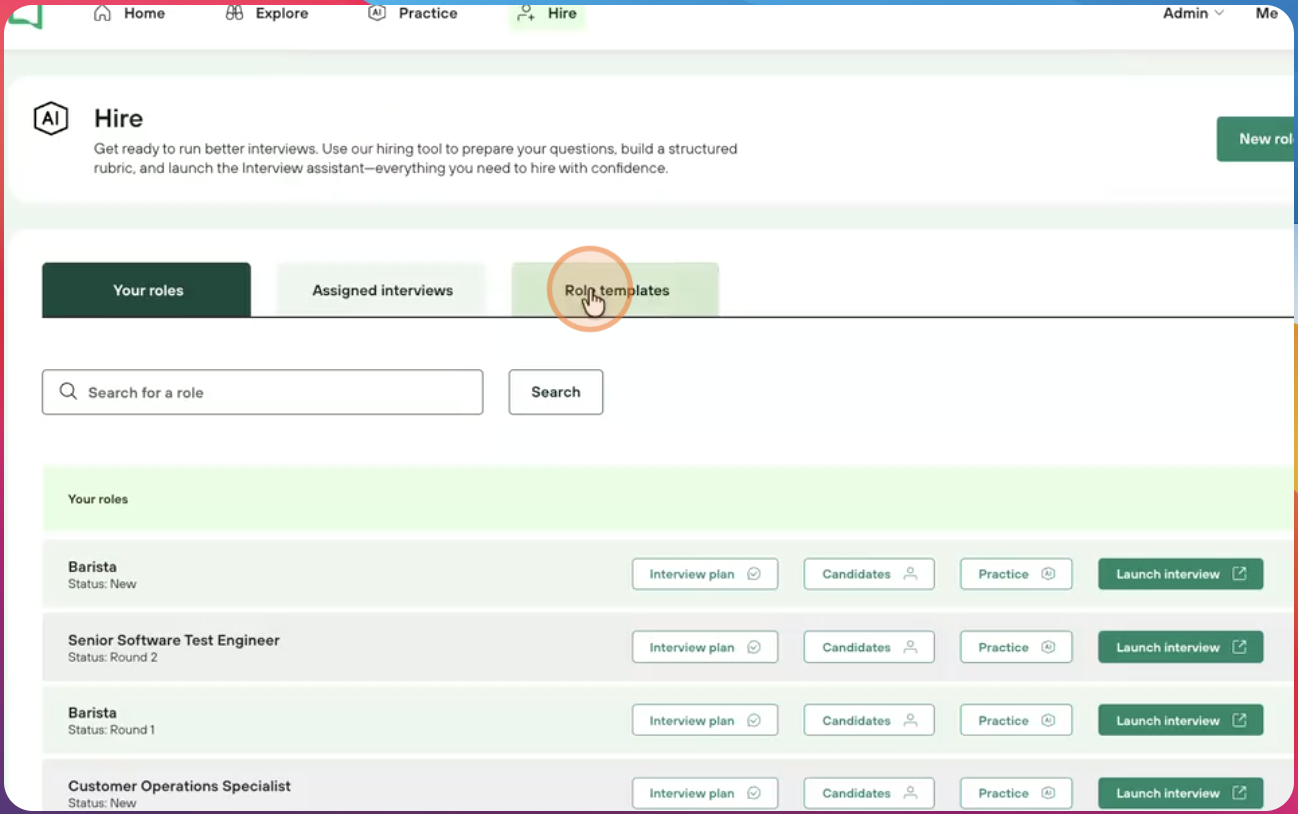
Your interview plan template has now been saved. You can access it via the Role templates tab.
Step 6: Use or delete the template
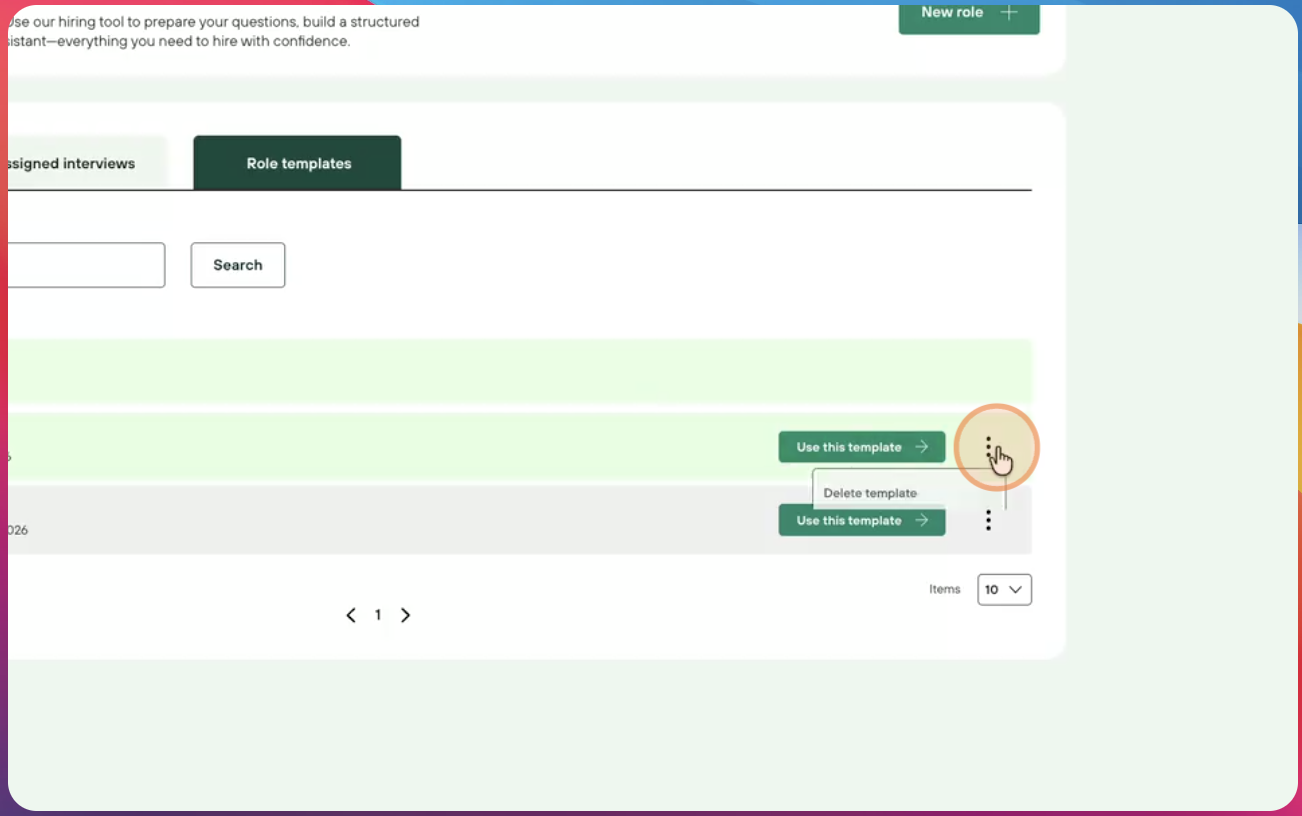
You can use the template at any time or delete it if needed.
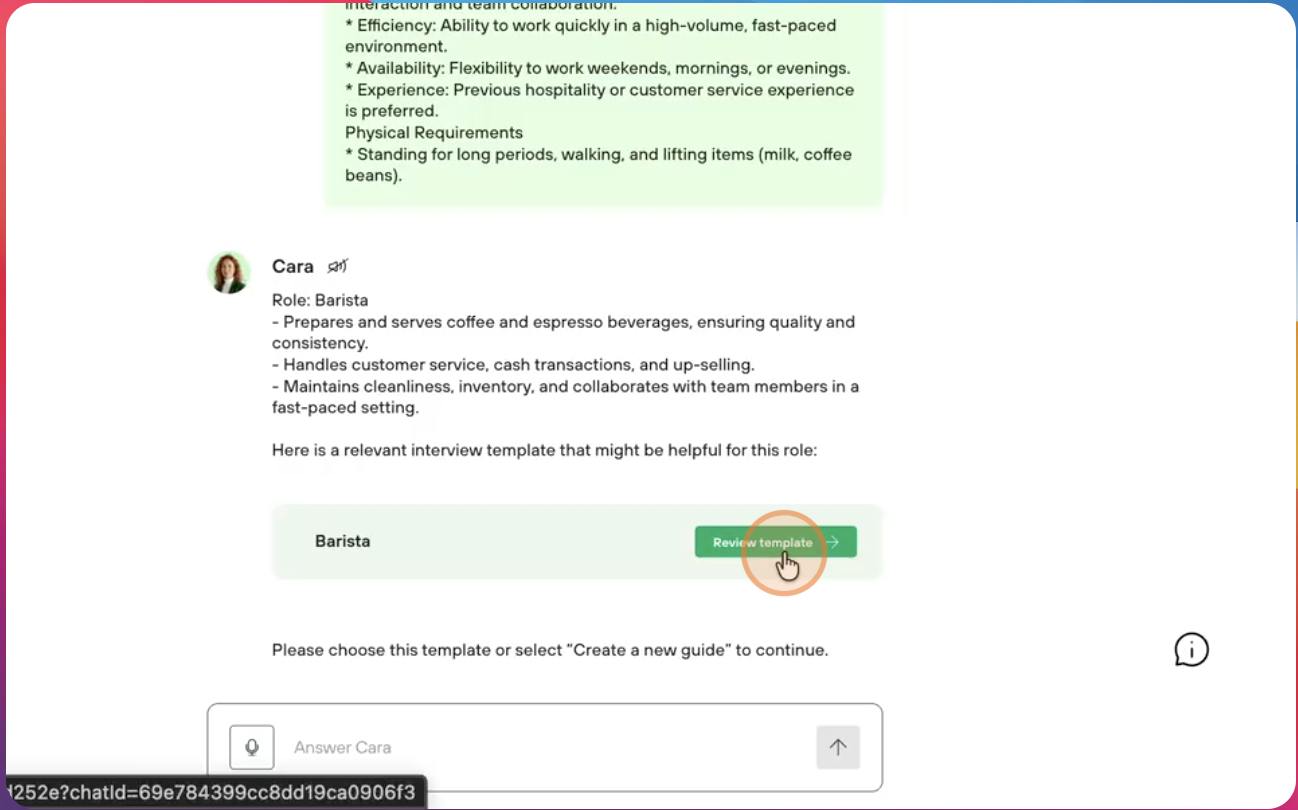
If someone creates a new role but is still looking for a barista, Cara will analyze the data and recommend template that have been saved.
Instead of going through the role creation process from scratch, you can click Review template to view the already created role.
This way, you have access to your templates and know how to create, delete, and use them.