
How to enable the option and set up SwiftSignUp?
The "SwiftSignUp" function is a part of the tool provided by SocialTalent, allowing the company admin to customize user registration settings. Here are the steps to activate this feature:
Contact SocialTalent Account Manager
The company admin should first get in touch with their SocialTalent Account Manager and express their interest in using the SwiftSignUp feature.Enable the feature in Admin → Organisation → SwiftSignUp
After discussions with the Account Manager, the admin will be able to enable the SwiftSignUp feature in the administrative settings (Admin Settings) of the SocialTalent platform.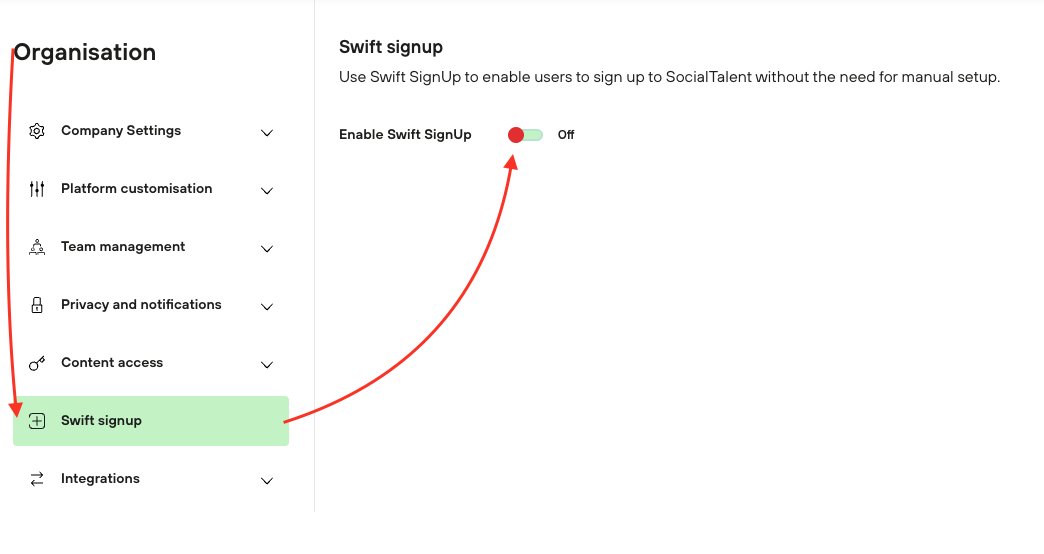
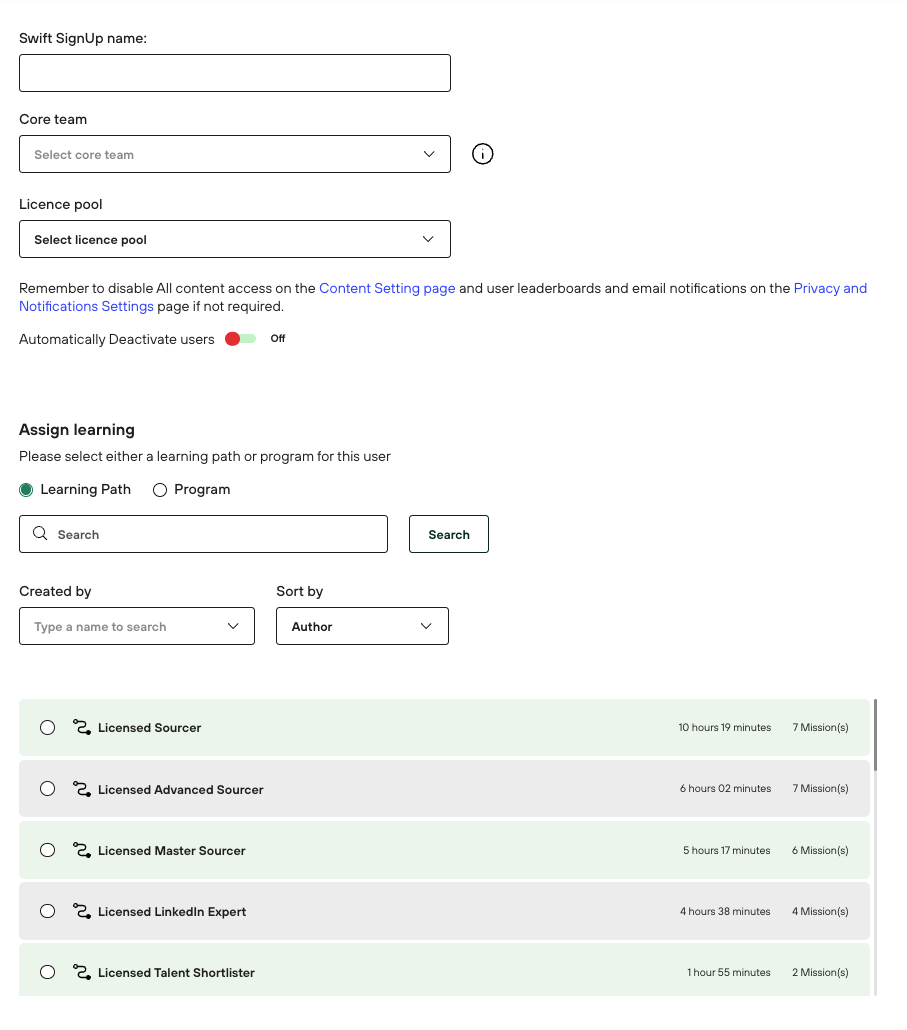
Basic settings setup
Slide the toggle switch from "OFF" to "ON."
Select the Core Team (the user will be assigned to the selected Core Team).
Choose the appropriate license pool (make sure you have available licences).
Choose a learning path (relevant learning path that will be automatically assigned to users using SwiftSignUp).
Choose the option if the users should be automatically deactivated after a selected number of days
Privacy and notifications settings
Disable access to all content on the Content Setting page if necessary.
Turn off user leaderboards and email notifications on the Privacy and Notifications Settings page if they are not needed.
Customization
Set a custom URL
This URL should be agreed upon with the SocialTalent Account Manager. It's worth noting that using a custom URL may exclude users from Single Sign-On (SSO). Therefore, it should only be used when SSO is disabled or when new users need to be excluded from SSO.Add the company logo
The logo must meet certain criteria, such as a minimum image height of 100 pixels, a maximum file size of 5 MB, and file formats of .png/.jpg/.jpeg/.svg.Add a description on the signup page
The description text should not exceed 250 characters.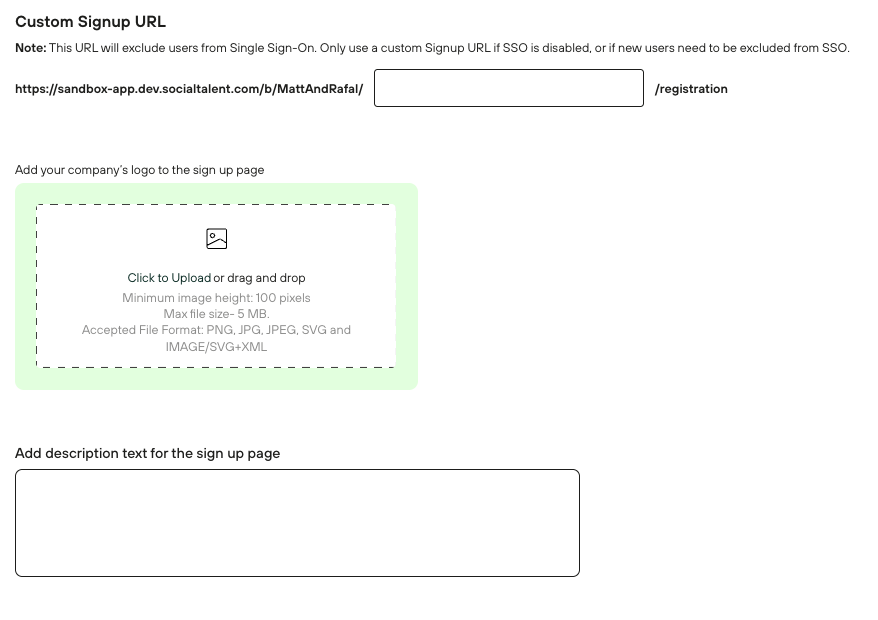
Save changes
After carefully configuring all the settings, the admin must click the "Save changes" button.
After completing these steps, the SwiftSignUp feature will be activated, and the admin can share a custom registration link that will include the customized settings and personalization.